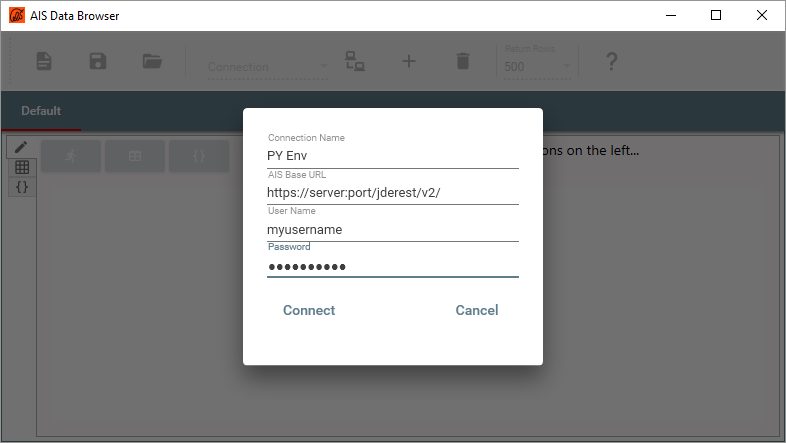
To connect to an AIS Server, use the + button in the toolbar to add a new connection.

Enter a name for the connection, the AIS Url and valid user name and press the Connect button.
Note the trailing v2/ in the example above, which stands for Version 2 of the AIS.
A successful connection will close the connection dialog box and show the connection in the drop-down list box with the user name within brackets to indicate that the connection is active.

The Submit and Get Columns buttons will also become available once a connection is active.
To add more connections, for example to different E1 environments, use the + button again. To delete a connection use the rubbish bin to the right of the + button and to connect to an existing connection use the connect button to its left.
A failed connection will display an error message on the bottom of the dialog.
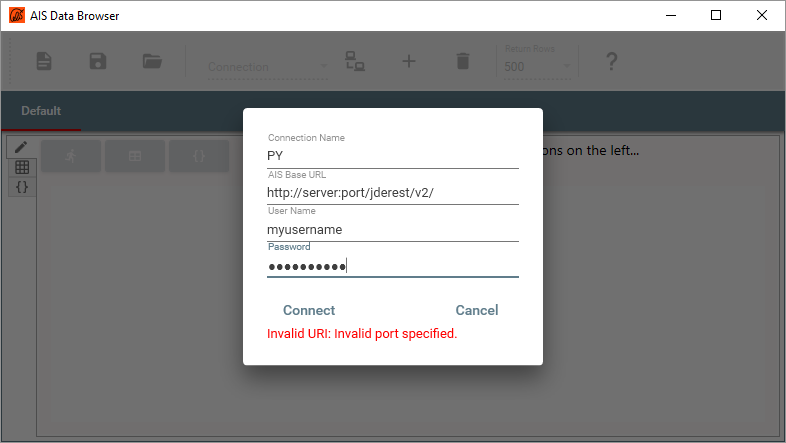
There are two reasons for connection failure.
- Invalid
AIS Base Url. To verify the Url, copy it to a browser’s address bar and append it withdefaultconfig. This should return the AIS Server Capabilities (the return is a json file which might cause the browser to prompt wheather to open it). - Invalid user name or password. This will typically result in a
Forbiddenerror.